Banana Pudding Cheesecake Cones
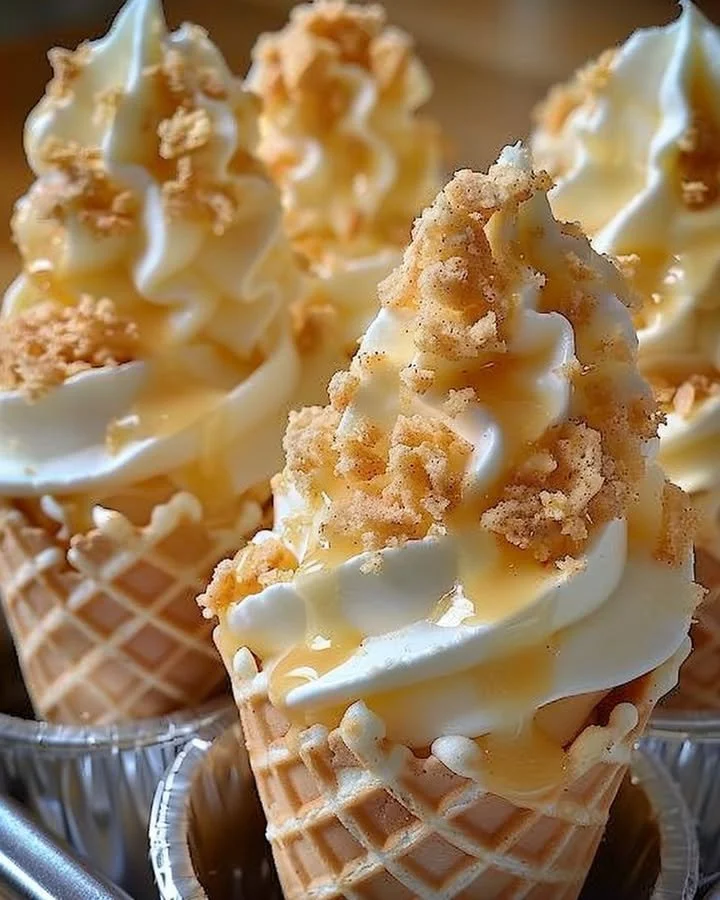
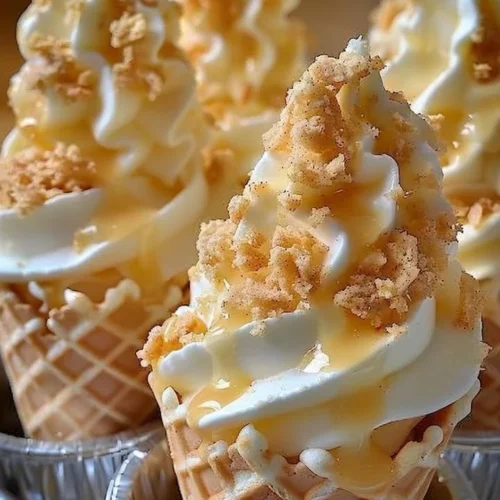
Banana Pudding Cheesecake Cones are a delightful twist on a classic dessert that brings together the rich, creamy texture of cheesecake with the nostalgic flavor of banana pudding. Imagine biting into a crunchy waffle cone filled with layers of luscious cheesecake filling, fresh bananas, and a sweet layer of crushed vanilla wafers. This dessert is not only visually appealing but also offers a playful presentation that is sure to impress your family and friends. Whether you’re hosting a gathering or looking for a fun treat for the kids, Banana Pudding Cheesecake Cones are a must-try recipe that will quickly become a favorite.
Why You’ll Love This Recipe
This recipe is perfect for anyone seeking an easy and delicious dessert. With minimal prep time and simple ingredients, it’s a family-friendly treat that caters to all ages. Plus, the step-by-step method is straightforward, making it a breeze even for beginner cooks. The combination of flavors and textures provides an indulgent experience without overwhelming your palate. In no time, you can whip up these cones for a fun party dessert or a sweet snack to satisfy your cravings. Grab your ingredients, and let’s dive into this delightful recipe.
Ingredients for Banana Pudding Cheesecake Cones
To create these delicious Banana Pudding Cheesecake Cones, you’ll need the following ingredients:
- 6 waffle cones: These provide a crunchy, sweet vessel for the cheesecake filling.
- 1 (8 oz) block cream cheese, softened: Adds a rich and creamy base to your cheesecake filling.
- 1/2 cup sweetened condensed milk: Brings a silky sweetness to balance the other flavors.
- 1 (3.4 oz) box instant banana cream pudding mix: Infuses the mixture with a delicious banana flavor.
- 1 1/2 cups cold milk: Helps achieve the desired creamy consistency.
- 1 tsp vanilla extract: Enhances the sweetness and flavor profile.
- 1 cup whipped topping (like Cool Whip): Lightens up the cheesecake filling for a fluffy texture.
- 1/2 cup crushed vanilla wafers: Adds a nice crunch and flavor contrast.
- 1 large banana, sliced: The star of the dessert that adds freshness.
- Extra whipped topping & wafers for garnish: Finishing touches to make your cones visually appealing.
Step-by-Step Directions
Mix the Base: In a large bowl, start by beating the softened cream cheese until it is smooth and creamy. This step is crucial for achieving the perfect cheesecake texture.
Combine Ingredients: Next, add the sweetened condensed milk, banana cream pudding mix, cold milk, and vanilla extract to the bowl. Whip these ingredients until the mixture is thick and fully combined, creating a luscious filling.
Fold in the Topping: Gently fold in the whipped topping until everything is light and fluffy. This adds volume to the filling and keeps it airy.
Layer the Cones: Begin by layering the bottom of each waffle cone with crushed vanilla wafers, followed by a spoonful of the cheesecake filling, and then a slice or two of banana. Continue this process until the cones are full, making sure to finish with a layer of filling.
Garnish and Chill: Top each cone with extra whipped topping, add more crushed wafers for crunch, and finish with a slice of banana or a whole wafer for garnish. For the best texture, chill the cones upright for 30 minutes before serving.
Tips & Tricks
To take your Banana Pudding Cheesecake Cones to the next level, consider these chef’s secrets:
- Make Ahead: Prepare the filling a day in advance and store it in the fridge to develop the flavors. Just fill the cones on the day of serving.
- Variations of Topping: Try using flavored whipped topping, like banana or vanilla bean, to complement the banana flavor in the cheesecake.
- Experiment with Flavor: Add a hint of cinnamon or nutmeg to the cheesecake filling for a unique twist.
- Add Texture: Incorporate mini chocolate chips or butterscotch chips into the cheesecake filling for additional flavor surprises.
- Waffle Cone Alternatives: If you’re looking for a different base, consider using sugar cones or even homemade cookie cups.
Serving Suggestions & Pairings
These Banana Pudding Cheesecake Cones are not only delicious but also versatile. Serve them at birthday parties, family gatherings, or during summer barbecues. For a delightful pairing, serve them alongside a scoop of vanilla ice cream or a dollop of whipped cream. Consider making a banana split bar where guests can create their dessert with a variety of toppings alongside Banana Pudding Cheesecake Cones. The kids will love the interactive element!
Nutritional Information
While indulging in these Banana Pudding Cheesecake Cones is a treat, it’s also helpful to keep track of the nutritional content. Each cone is likely to contain approximately 250-300 calories, depending on the size of your cones and the amount of filling you use. They also deliver a mix of carbohydrates from the waffles and sugars from the toppings, making them a sweet indulgence. Enjoying them occasionally is all part of a balanced lifestyle!
Storing Tips & Variations for Banana Pudding Cheesecake Cones
If you have any leftover Banana Pudding Cheesecake Cones, store them in the refrigerator in an airtight container to maintain their freshness. They are best consumed within two days, as the waffle cones can become soggy over time. Alternatively, you can keep the cheesecake filling and assembled cones separate until you’re ready to serve.
For healthier swaps, consider using low-fat cream cheese or sugar-free pudding mix without sacrificing flavor. You can also try adding layers of fresh strawberries or blueberries between the bananas for a fruity twist.
Conclusion for Banana Pudding Cheesecake Cones
With their enticing layers and delightful crunch, Banana Pudding Cheesecake Cones are the ultimate dessert for any occasion. Easy to make, and oh-so-satisfying, they are perfect for impressing guests or treating yourself. Don’t wait – gather your ingredients and start creating these beautiful cones today!
FAQs
1. Can I use a different type of pudding mix?
Absolutely! While banana pudding adds a specific flavor, you can experiment with vanilla or even chocolate pudding mixes for a different taste.
2. How long can I store the cheesecake filling?
The cheesecake filling can be stored in the refrigerator for up to 3 days, but it is best enjoyed fresh to keep the texture perfect.
3. Can I make these cones without the whipped topping?
Yes, you can skip the whipped topping if you prefer a denser filling. However, it does help lighten the mixture.
4. What’s the best way to serve them?
Serve your cones upright in a cup or a cone holder to make them stand out and showcase those beautiful layers.
5. Can I freeze the cheesecake filling?
While you can freeze the filling, it’s best fresh for the taste and texture. If you freeze it, make sure to thaw it completely before using, and adjust the texture with a bit of milk if needed.
Banana Pudding Cheesecake Cones
Ingredients
For the Cheesecake Filling
- 1 block cream cheese, softened 8 oz
- 1/2 cup sweetened condensed milk
- 1 box instant banana cream pudding mix 3.4 oz
- 1 1/2 cups cold milk
- 1 tsp vanilla extract
- 1 cup whipped topping (like Cool Whip)
For Assembly
- 6 pieces waffle cones
- 1/2 cup crushed vanilla wafers
- 1 large banana, sliced The star fruit of the dessert
- extra whipped topping & wafers for garnish For finishing touches
Instructions
Preparation
- In a large bowl, start by beating the softened cream cheese until it is smooth and creamy.
- Add the sweetened condensed milk, banana cream pudding mix, cold milk, and vanilla extract to the bowl. Whip the mixture until thick and fully combined.
- Gently fold in the whipped topping until everything is light and fluffy.
Assembly
- Layer the bottom of each waffle cone with crushed vanilla wafers.
- Add a spoonful of the cheesecake filling, followed by a slice or two of banana. Repeat the process until the cones are full, finishing with a layer of filling.
- Top each cone with extra whipped topping, more crushed wafers, and a slice of banana or a whole wafer for garnish.
- Chill the cones upright for 30 minutes before serving.