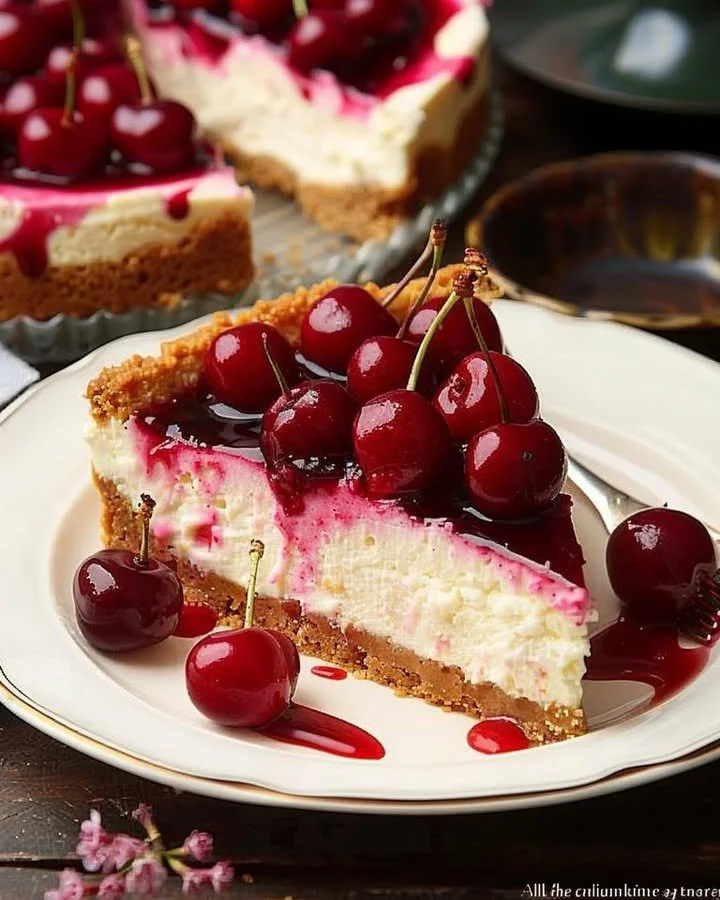
Philadelphia Cherry Cheesecake
The delightful Philadelphia Cherry Cheesecake is a mesmerizing dessert that transports you to a world of creamy indulgence with every bite. Picture a velvety texture and a harmonious blend of sweet and tart flavors. The moment you take your first forkful, you’re greeted by the luscious cream cheese filling gently cradled by a buttery graham cracker crust, topped with vibrant cherry pie filling that adds a burst of color and sweetness. This recipe allows you to craft a memory that fills your kitchen with warm aromas and leaves your loved ones asking for seconds. Join me on this step-by-step journey to create a cheesecake that’s not just a dessert but an experience.
History / Fun Fact
The origins of cheesecake can be traced back to ancient Greece, where it was served as a simple energy-boosting food for athletes during the first Olympic games. Over centuries, cheesecake has evolved, but the iconic Philadelphia-style cheesecake encapsulates the creamy, rich indulgence that has won hearts around the globe. The famous Philadelphia cream cheese, first introduced in 1872, revolutionized cheesecake-making, giving bakers a smooth, firm texture. Adding cherry pie filling to the top of this already decadent cake is a nod to classic American desserts, combining tradition with a playful twist. Each slice of Philadelphia Cherry Cheesecake tells a story, rich with history and enticing flavors.
Ingredients
To create the perfect Philadelphia Cherry Cheesecake, gather these rich and aromatic ingredients:
- 1 1/2 cups of graham cracker crumbs, offering a sweet crunch.
- 1/4 cup of granulated sugar, adding just the right amount of sweetness to your crust.
- 1/2 cup of unsalted butter, melted to impart a luxurious texture.
- 2 packages (8 oz each) of Philadelphia cream cheese, softened to achieve that creamy, dreamy base.
- 1 cup of granulated sugar, enhancing the sweet notes of the filling.
- 3 large eggs, essential for binding and enriching the cheesecake.
- 1 tsp of vanilla extract, lending a heavenly aroma and depth of flavor.
- 1/2 cup of sour cream, introducing a slight tang that complements the sweetness.
- 1 can (21 oz) of cherry pie filling, featuring bright, juicy cherries that crown your masterpiece.
Cooking Time & Tips for Philadelphia Cherry Cheesecake
When it comes to preparing your Philadelphia Cherry Cheesecake, you have options for speed. For quicker preparation, use a pre-made crust and ensure your cream cheese is very soft to blend easily. If you’re up for it, slow preparation creates a depth of flavor that elevates the dish. Take your time. Allow the cheesecake to cool completely before chilling – patience pays off!
Practical tips include ensuring all ingredients are at room temperature for smooth mixing and avoiding overbeating the cream cheese to keep your cheesecake light. Lastly, don’t rush the chilling process; letting it rest overnight enhances the flavor as it sets.
Step-by-Step Directions
Preheat your oven to 325°F (160°C). Grease a 9-inch springform pan, allowing for easy release after baking, and making preparation a breeze.
In a mixing bowl, combine 1 1/2 cups of graham cracker crumbs with 1/4 cup of granulated sugar and 1/2 cup of melted unsalted butter. The aroma of buttery graham crackers fills the air as you mix until all crumbs are coated. Using your fingers or a flat surface, press this crumbly mixture into the bottom of your prepared pan, forming a solid crust. Bake for 10 minutes to release the buttery aroma, then allow it to cool as you prepare the filling.
In another bowl, beat together the 2 softened packages of Philadelphia cream cheese and 1 cup of granulated sugar until smooth and creamy. The transformation from solid cream cheese to a silky mixture is fascinating. Add eggs one at a time, blending after each addition, followed by 1 teaspoon of vanilla extract and 1/2 cup of sour cream to achieve that luscious creaminess.
Pour this heavenly cream cheese filling over the cooled crust and smooth the top with a spatula. As you do, take a moment to appreciate the beautiful swirl of colors. Bake for 55-60 minutes until the edges are set but the center remains slightly jiggly. The top should have a light golden hue. Let the alluring aromas waft through your kitchen as it bakes.
Once baked, remove the cheesecake from the oven and let it cool in the pan to room temperature, allowing its delightful aroma to fill your home. Once cooled, wrap it in plastic wrap and chill in the refrigerator for at least 4 hours – overnight is even better, enhancing the flavors.
Just before serving, generously top your cheesecake with the cherry pie filling, ensuring each slice is a masterpiece of vivid red nestled atop creamy white.
Serving Suggestions & Occasions
Philadelphia Cherry Cheesecake is perfect for all occasions. Whether it’s a holiday gathering, a family dessert night, or a potluck, this cheesecake always impresses. Serve it with a dollop of whipped cream and a sprig of mint for a sophisticated touch. It pairs brilliantly with a cup of coffee or a glass of chilled milk, enhancing the dessert experience. This cheesecake can effortlessly transform a simple dinner into a memorable occasion, leaving your guests raving about it days later.
Common Mistakes for Philadelphia Cherry Cheesecake
One of the most common pitfalls is rushing the chilling process. This cheesecake benefits from time to set and develop its luxurious texture. Another mistake is overmixing the cream cheese, which can lead to cracks in the top. Keep a gentle hand during mixing. You might also forget to grease the springform pan, making it challenging to release your cheesecake later. Lastly, ensure your ingredients are at room temperature; this helps avoid lumps and ensures even mixing.
Healthier Alternatives & Variations
For a healthier twist, consider using low-fat cream cheese or Greek yogurt in place of sour cream, maintaining that creamy texture with fewer calories. Incorporating almond flour instead of traditional graham crackers can provide a nutty flavor and a gluten-free option. To add variety, swap the cherry topping for strawberries or blueberries to create seasonal variations that celebrate different fruits throughout the year.
FAQs
Can I freeze Philadelphia Cherry Cheesecake?
Yes! Wrap it tightly in plastic wrap and then in aluminum foil before freezing. It can last up to three months. Thaw in the refrigerator overnight before serving.How long does this cheesecake last in the fridge?
When properly stored, it can last up to a week in the refrigerator.Can I use a different type of fruit topping?
Absolutely! Feel free to get creative with different pie fillings, fresh fruits, or even chocolate sauce.Is there a non-dairy option for this recipe?
There are dairy-free cream cheese alternatives available that work well as substitutes. Use these for a similar texture.Can I make this cheesecake in advance?
Yes! It’s even better when made a day or two ahead, allowing the flavors to meld beautifully.How can I tell when my cheesecake is done baking?
Look for the edges to be set while the center remains slightly jiggly. It will continue to firm up as it cools.
Conclusion
Philadelphia Cherry Cheesecake is an enchanting dessert that will undoubtedly become a classic in your kitchen. With its creamy filling, buttery crust, and bright cherry topping, it’s not just a dish – it’s an experience. Indulge in the delightful textures and flavors that this cheesecake offers, and treat yourself and your loved ones to a slice of heaven. Try making it today, and watch as it transforms your dessert game forever!
Philadelphia Cherry Cheesecake
Ingredients
Crust Ingredients
- 1.5 cups graham cracker crumbs Offering a sweet crunch.
- 0.25 cups granulated sugar Adding sweetness to your crust.
- 0.5 cups unsalted butter, melted Imparting a luxurious texture.
Cheesecake Filling Ingredients
- 16 oz Philadelphia cream cheese, softened Achieving a creamy, dreamy base.
- 1 cups granulated sugar Enhancing the sweet notes.
- 3 large eggs Essential for binding.
- 1 tsps vanilla extract Lending flavor.
- 0.5 cups sour cream Introducing a slight tang.
Topping
- 1 can cherry pie filling (21 oz) Featuring bright, juicy cherries.
Instructions
Preparation
- Preheat your oven to 325°F (160°C) and grease a 9-inch springform pan.
- In a mixing bowl, combine graham cracker crumbs, granulated sugar, and melted butter, then press into the bottom of the prepared pan.
- Bake the crust for 10 minutes and allow it to cool.
- In another bowl, beat the softened cream cheese and granulated sugar until smooth.
- Add eggs one at a time, blending after each addition, then mix in vanilla extract and sour cream.
- Pour the filling over the cooled crust and smooth the top.
- Bake for 55-60 minutes, until the edges are set but the center remains slightly jiggly.
- Let the cheesecake cool to room temperature, then chill in the refrigerator for at least 4 hours, preferably overnight.
- Top with cherry pie filling before serving.