Floral Butter Cookies with Royal Icing
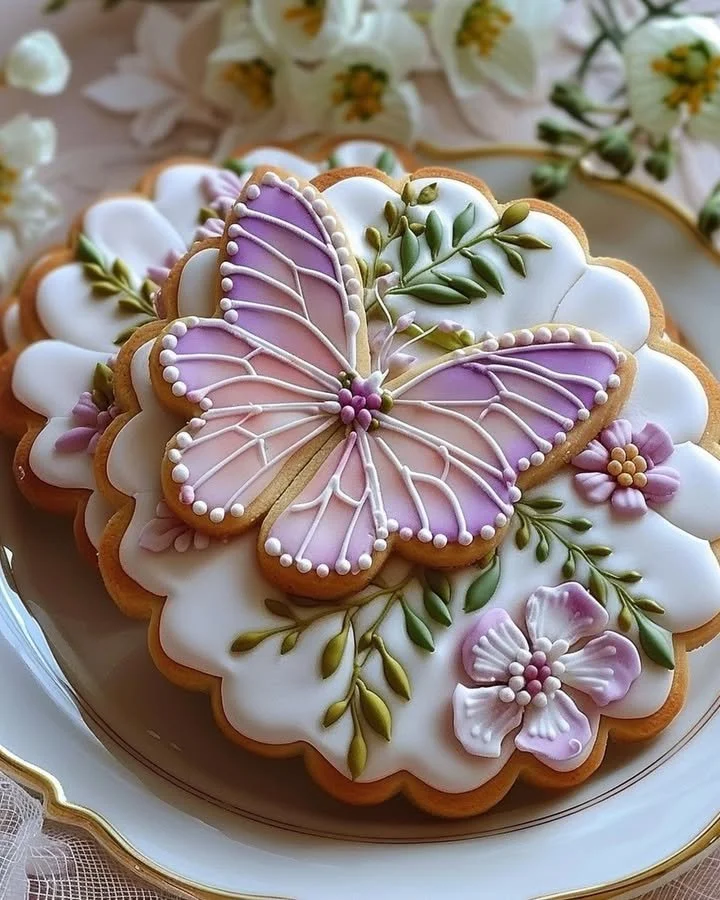
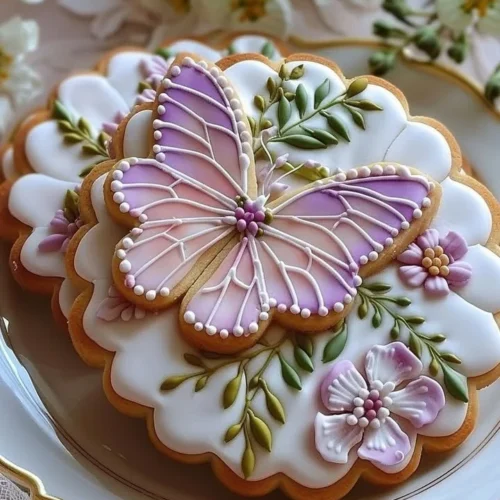
There’s something enchanting about Floral Butter Cookies with Royal Icing—a delightful treat that combines tender, buttery cookie goodness with the artistic charm of vibrant royal icing. This recipe is your gateway to a magical baking experience with step-by-step instructions that anyone, from beginners to seasoned bakers, can follow. The aroma of freshly baked cookies fills the air, invoking warmth and nostalgia, inviting you to indulge in a moment of sweet bliss.
Imagine the softness of buttery dough in your hands, the rich flavor melting on your tongue with a delicate crunch. These cookies not only please the palate but also delight the eyes, adorned with colorful icing that transforms them into little pieces of art. Each bite promises a burst of sweetness, a moment of joy perfect for any occasion.
History / Fun Fact
The tradition of making decorated cookies dates back to the Middle Ages, where elaborate designs were created for special occasions and celebrations. Originally, these treats were often intricately etched or painted with edible colors. Floral Butter Cookies, as we enjoy them today, can be traced to various cultural practices where cookies were more than just food but a reflection of artistry and celebration. They became particularly popular in the Victorian era when lavish gatherings called for stunning desserts. This recipe revives that sentiment, inviting you to create delightful memories, one cookie at a time.
Ingredients
Creating Floral Butter Cookies with Royal Icing requires a handful of simple yet essential ingredients that bring vivid textures and exuberant flavors to life. You’ll need 2 1/4 cups of all-purpose flour, which forms the perfect base for a light and fluffy cookie. The creamy richness of 1 cup of unsalted butter, softened to perfection, complements 1/2 cup of powdered sugar for that melt-in-your-mouth experience. A teaspoon of aromatic vanilla extract paired with a 1/4 teaspoon of optional almond extract adds a fragrant depth to the flavor. Don’t forget a touch of salt to balance the sweetness.
For the royal icing, an egg white or 3 tablespoons of meringue powder ensures that it sets beautifully. Sweetened with 1 3/4 cups of powdered sugar and brightened with a 1/2 teaspoon of lemon juice, it becomes the canvas for your creativity. Lastly, vibrant gel food colors in hues of pink, purple, green, and yellow bring your blooms to life, transforming each cookie into a colorful masterpiece.
Cooking Time & Tips For Floral Butter Cookies with Royal Icing
Making Floral Butter Cookies is a delightfully gratifying experience that can be approached both quickly and leisurely. If you’re short on time, you can whip up the cookie dough and have fresh cookies in under an hour. A slower preparation allows you to enjoy the art of decorating, so take your time with the royal icing and the intricate designs.
For success, remember to cream the butter and sugar well—this adds air and lightness to the cookies. Also, ensure your cookie dough is not too warm when rolling out, as warm dough can lead to misshapen cookies. If you’re planning to indulge later, store the cookies in an airtight container to maintain their freshness.
Step-by-Step Directions For the Cookies
To start your baking adventure, preheat your oven to a cozy 350°F (175°C). Meanwhile, line a baking sheet with parchment paper, creating a perfect surface for your cookies to bake on.
In a large mixing bowl, introduce the softened butter to the powdered sugar. As you cream them together, watch as they transform into a light, fluffy cloud of sweetness. The sweet scent will start to fill your kitchen, inviting excitement into the air. Next, add the vanilla extract, almond extract (if you chose to include it), and a pinch of salt—each ingredient harmonizing in a soothing melody.
Now, it’s time for the pièce de résistance! Gradually add the all-purpose flour, a generous 1/4 cup at a time. Mix gently until the dough comes together, combining all those glorious ingredients into a cohesive unit. It’s a satisfying process, feeling the dough form under your palms as you prepare to roll it out.
Sprinkle a lightly floured surface before rolling out the dough to about 1/4 inch thick. The texture should feel luxurious as you work with it. Using your favorite cookie cutter, cut the dough into lovely flower shapes and transfer them to your prepared baking sheet. As they sit proudly on the tray, they’re ready to be baked. Pop them into the oven and let them bake for 8-10 minutes until the edges are kissed with a golden hue. Once baked, allow the cookies to cool completely on a wire rack, their tempting aroma still lingering.
For the royal icing, whisk together your egg white (or meringue powder) with lemon juice until frothy. Gradually mix in the powdered sugar, watching as it transforms into a smooth, stiff mixture. If you’re seeking the perfect consistency, feel free to add a splash of water if it’s too thick.
Once your royal icing is ready, divide it into bowls and carefully add drops of gel food coloring, creating a vibrant spectrum of hues. Prepare piping bags filled with your colorful icings, or simply use a small spoon for more casual decoration.
As you begin decorating, outline the shapes of the flowers with the icing, then fill in with royal icing in various colors for petals, leaves, and centers. The excitement culminates as you watch your artistic creation unfold before you. Allow the cookies to dry for at least 2-3 hours. This crucial step ensures the royal icing hardens beautifully, ready for enjoyment or storage.
Serving Suggestions & Occasions
Floral Butter Cookies with Royal Icing are a stunning addition to any gathering. Picture a springtime tea party, where these cookies become a charming centerpiece atop delicate china. They make excellent treats for weddings, bridal showers, or baby showers, each colorful design reflecting a joyful celebration.
Serve them alongside a fragrant herbal tea to complement the sweetness, or pack them neatly into gift boxes for a delightful homemade gift. They are equally perfect for family gatherings, birthday parties, or simply indulging yourself during a cozy afternoon.
Common Mistakes For Floral Butter Cookies with Royal Icing
While crafting these lovely cookies, some common pitfalls can detract from their charm. One common mistake is overmixing the dough, leading to tough cookies instead of the desired tenderness. Always balance the flour addition carefully; too much can also ruin the texture.
Another frequent error is under-baking—the cookies should be baked until the edges turn golden, but not further, to avoid them becoming dry. When it comes to royal icing, ensure it’s not too runny or overly stiff; the right consistency is key for both piping and decorating.
Healthier Alternatives & Variations
For those seeking a lighter option, consider substituting unsalted butter with coconut oil, which adds a delightful hint of flavor. You might also experiment with whole wheat flour for a nuttier taste, or use almond flour for a gluten-free alternative.
In terms of variations, think about incorporating zest from citrus fruits into your cookie dough for an added depth of flavor. You could also play with different extracts or rotate your choice of gel colors to create themed cookies for holidays or special events.
FAQs
Can I make the dough ahead of time and freeze it?
Yes! You can prepare the dough in advance and freeze it. Just wrap it tightly in plastic wrap, and it will keep for up to three months. Thaw it in the fridge before rolling out.Is it necessary to use royal icing for decoration?
While royal icing creates a stunning finish, you can use melted chocolate or simple glaze for decoration if preferred.Can I use regular food coloring instead of gel?
Gel food colors provide more vibrancy without altering the consistency, so they are recommended. However, regular food coloring can be used sparingly.What can I do with leftover royal icing?
Store any remaining royal icing in an airtight container for up to a week. Just be sure to re-whip it before use, as it may harden.Are Floral Butter Cookies suitable for kids?
Absolutely! Involve kids in the decoration process for fun family bonding time. They’ll love expressing their creativity!How can I store my decorated cookies?
Keep your decorated Floral Butter Cookies in an airtight container at room temperature for up to a week and in the fridge for up to two weeks.
Conclusion
Now that you’ve immersed yourself in the world of Floral Butter Cookies with Royal Icing, it’s time to bring this enchanting recipe to life in your own kitchen. The joy of crafting these delicate cookies, infused with love and imagination, awaits you! Grab your ingredients and let the magic of baking transport you as you create sweet floral delights that will surely impress family and friends. Don’t wait any longer—your perfect afternoon of baking is just around the corner!
Floral Butter Cookies with Royal Icing
Ingredients
For the Cookies
- 2 1/4 cups all-purpose flour
- 1 cup unsalted butter, softened
- 1/2 cup powdered sugar for a melt-in-your-mouth experience
- 1 teaspoon vanilla extract
- 1/4 teaspoon almond extract optional for added flavor
- 1 pinch salt to balance sweetness
For the Royal Icing
- 1 each egg white or 3 tablespoons meringue powder to ensure proper icing consistency
- 1 3/4 cups powdered sugar
- 1/2 teaspoon lemon juice to brighten the flavor
- as needed drops gel food colors in your choice of colors
Instructions
Preparation
- Preheat your oven to 350°F (175°C) and line a baking sheet with parchment paper.
- In a large mixing bowl, cream together the softened butter and powdered sugar until light and fluffy.
- Add in the vanilla extract, almond extract (if using), and a pinch of salt, mixing until combined.
- Gradually add the all-purpose flour, a 1/4 cup at a time, mixing gently until the dough forms.
- Roll out the dough on a lightly floured surface to about 1/4 inch thick and cut into flower shapes.
- Transfer the cookies to the prepared baking sheet and bake for 8-10 minutes until the edges are golden.
- Allow the cookies to cool completely on a wire rack.
Making the Royal Icing
- In a bowl, whisk together the egg white (or meringue powder) and lemon juice until frothy.
- Gradually mix in the powdered sugar until you achieve a smooth, stiff mixture.
- Divide the icing into bowls and add gel food coloring to create your desired hues.
Decorating the Cookies
- Using piping bags or a spoon, outline and decorate the cooled cookies with royal icing.
- Allow the cookies to dry for at least 2-3 hours for the icing to harden.