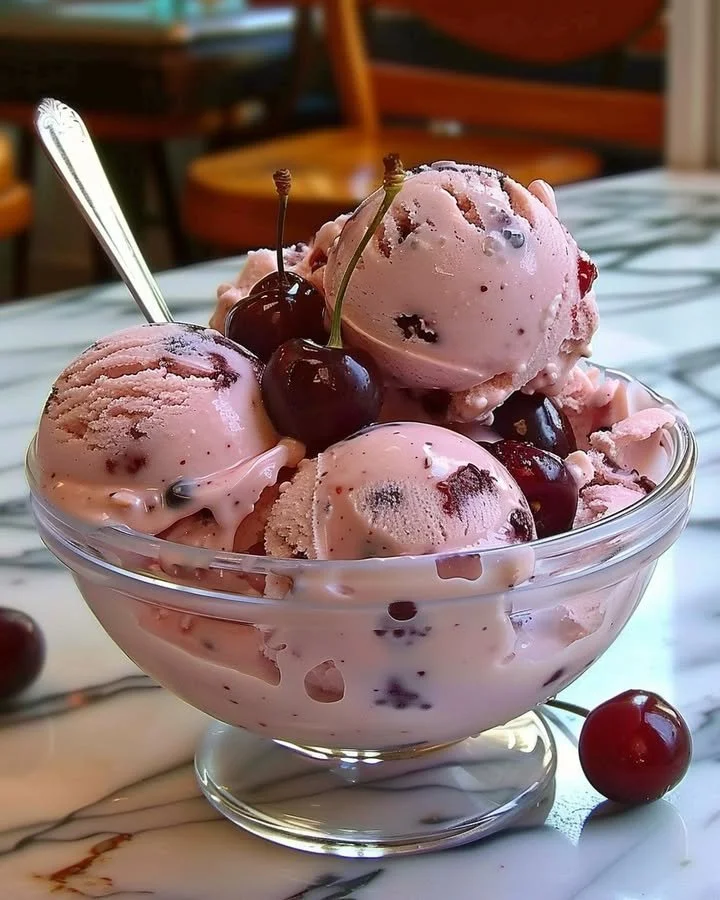
Homemade Cherry Ice Cream
Indulging in a bowl of Homemade Cherry Ice Cream is a delightful experience that captures the essence of summer. Imagine the creamy texture gliding over your tongue, the vibrant red bits of fresh cherries bursting with flavor, and the sweet aroma wafting from the churner. This recipe is a perfect blend of rich creaminess and fruity freshness, making it a versatile treat for any occasion. In this step-by-step guide, we’ll navigate the simple yet enchanting process of crafting your cherry ice cream right in your own kitchen.
History / Fun Fact
Ice cream has a rich history that dates back centuries, with origins traced back to ancient China, where a frozen mixture of milk and rice was enjoyed as a delicacy. Over the years, this delectable treat evolved into various forms, eventually leading to the creation of the ice cream we know and love today. Cherries, particularly the Bing variety, were historically favored by many dessert makers because their natural sweetness offers a perfect complement to the rich cream base. The combination of cherries and cream in desserts blossomed in Europe and has now become a beloved staple in many households worldwide, especially during cherry season.
Ingredients
To create your Homemade Cherry Ice Cream, gather the following ingredients:
- 2 cups heavy cream: This luscious cream is what gives the ice cream its rich and velvety texture.
- 1 cup whole milk: Adds a creamy consistency while balancing the richness of the heavy cream.
- 3/4 cup granulated sugar: Sweetness is essential, and this sugar creates a delightful harmony with the cherries.
- 1 teaspoon vanilla extract: A fragrant addition that enhances the depth of flavor in your ice cream.
- 2 cups fresh cherries, pitted and chopped: Bright, aromatic, and bursting with juicy flavor, cherries are the star of this recipe.
- 1 tablespoon lemon juice: A splash of citrus that brightens the cherry flavor and keeps the vibrant color.
- 1/2 teaspoon almond extract (optional): A touch of nuttiness that pairs beautifully with cherries.
- 1 tablespoon cornstarch (optional, for thickening): If you desire a richer texture, this addition can result in an even creamier ice cream.
Ensure all ingredients are halal, so you can savor every delightful scoop without concern.
Cooking Time & Tips For Homemade Cherry Ice Cream
When it comes to ice cream, there are typically two paths you can take: the quick route or the slow and classic method. The quick method involves basic mixing and freezing, perfect for when you’re short on time but still want something creamy and delicious. Conversely, the traditional method, described here, allows the flavors to meld beautifully and results in a smoother, more refined texture.
To ensure your cherry ice cream is a success, here are some practical tips: Always use fresh cherries for maximum flavor, and let your ice cream mixture cool to room temperature before churning to achieve optimal texture. Don’t rush the process; the best ice creams are worth the wait!
Step-by-Step Directions
Begin by grabbing a medium saucepan and combine the heavy cream, whole milk, and sugar. As you heat the mixture over medium heat, stir occasionally, allowing the sugar to dissolve completely and the aromas to embrace your kitchen.
In a separate small bowl, mix the cornstarch with 2 tablespoons of milk to create a slurry. This ingredient is optional but can thicken your mixture beautifully. Gradually stir the slurry into the warm cream mixture, stirring constantly until it thickens slightly, which should take about 5-7 minutes.
Once thickened, remove the saucepan from the heat and stir in the vanilla extract along with the almond extract if you choose to use it. Allow the mixture to cool to room temperature as the anticipation grows.
While your base cools, take a bowl and toss the chopped cherries with the lemon juice. This step will not only preserve their vibrant color but will also enhance the natural fruity flavor.
Once the cream mixture has cooled completely, pour it into your ice cream maker and churn according to the manufacturer’s instructions. This process is where the magic happens, transforming your concoction into a creamy delight.
After churning, gently fold in the prepared cherries, distributing their sweetness evenly throughout the ice cream. Transfer your creation into an airtight container, and pop it in the freezer for at least 4 hours, or until it’s firm and ready to delight your taste buds.
When serving, scoop into bowls, and enjoy the explosion of cherry flavors in each spoonful!
Serving Suggestions & Occasions
Homemade Cherry Ice Cream is perfect for a variety of occasions. Whether it’s a hot summer day or a cozy family gathering, this treat can elevate any moment. Serve it alongside warm apple pie for a classic dessert pairing, or simply enjoy it on its own. For kids’ parties or summer barbecues, consider topping it with fresh mint or even drizzling a bit of chocolate sauce for an added touch of decadence.
As you gather friends and family for summertime fun, this homemade ice cream will be the highlight of dessert, creating memories filled with laughter and joy.
Common Mistakes For Homemade Cherry Ice Cream
Even the most seasoned bakers can sometimes stumble in the ice cream-making process. One common mistake is not allowing the cream mixture to cool properly before churning, which can lead to a grainy texture. Another is failing to properly pit the cherries, which can mar the outcome with tough bites. Remember, the freshness and quality of your cherries also make a significant difference; avoid using cherries that are overly ripe or bruised. Lastly, if you add too many cherries, the ice cream may become icy instead of creamy, so balance is key!
Healthier Alternatives & Variations
If you’re looking to make a healthier version of this delightful dish, consider substituting some of the heavy cream with Greek yogurt for added protein and lower fat content. For a vegan-friendly option, use full-fat coconut milk instead of heavy cream, and opt for a natural sweetener like maple syrup. You can also experiment with fruit variations by incorporating other berries such as strawberries or blueberries, or even create a fun mixed berry medley. For a gourmet twist, try adding a splash of fresh mint or white chocolate shavings to elevate the flavors in exciting new ways.
FAQs
Can I use frozen cherries for this recipe?
Yes! While fresh cherries are preferred, frozen cherries can work as well. Just ensure they are thawed and drained before use.How long can I store homemade cherry ice cream?
Homemade cherry ice cream can be stored in the freezer for up to 2 weeks, but it’s best enjoyed fresh within the first week.Can I make this ice cream without an ice cream maker?
Yes, you can pour the mixture into a shallow dish and freeze it, stirring every 30 minutes until it reaches your desired consistency.What can I use instead of cornstarch?
You can omit the cornstarch altogether, or substitute it with arrowroot powder for a similar thickening effect.How do I prevent ice crystals from forming?
Ensure your ice cream base is well-churned and avoid introducing air pockets when mixing in cherries. Keeping it in an airtight container and minimizing air exposure also helps.Is there a gluten-free version of this ice cream?
Absolutely! All the ingredients listed are naturally gluten-free, making this a delicious treat for everyone to enjoy.
Conclusion
Now that you have discovered the joy of creating Homemade Cherry Ice Cream, it’s time to treat yourself to a delightful journey of flavors and textures. Whether you share it with family and friends or savor each scoop in blissful solitude, this recipe promises a sweet escape from the ordinary. Grab those fresh cherries and embark on a delicious adventure today—you won’t regret it!
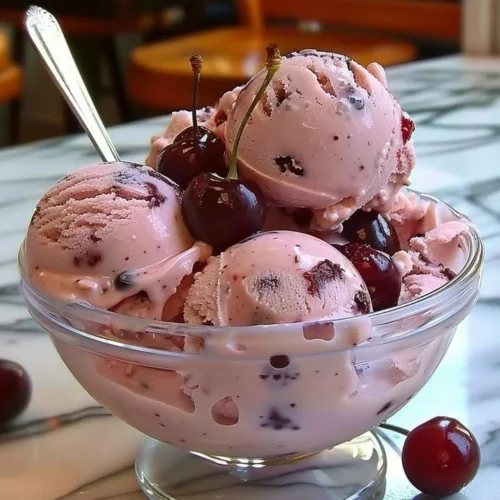
Homemade Cherry Ice Cream
Ingredients
Base Ingredients
- 2 cups heavy cream Provides a rich and velvety texture.
- 1 cup whole milk Adds a creamy consistency.
- 3/4 cup granulated sugar Creates a delightful harmony with the cherries.
- 1 teaspoon vanilla extract Enhances the flavor depth.
- 1 tablespoon lemon juice Brightens the cherry flavor.
Cherry Ingredients
- 2 cups fresh cherries, pitted and chopped The star ingredient, bursting with flavor.
- 1/2 teaspoon almond extract (optional) Adds a touch of nuttiness.
- 1 tablespoon cornstarch (optional, for thickening) For richer texture.
Instructions
Preparation
- Combine heavy cream, whole milk, and granulated sugar in a medium saucepan over medium heat, stirring occasionally until the sugar dissolves.
- In a small bowl, mix cornstarch with 2 tablespoons of milk to create a slurry, then stir it into the warm cream mixture until it thickens (about 5-7 minutes).
- Remove from heat and stir in vanilla extract and almond extract if using. Let the mixture cool to room temperature.
- Toss chopped cherries with lemon juice in a bowl to preserve color and enhance flavor.
Churning
- Once the cream mixture is completely cooled, pour it into your ice cream maker and churn according to the manufacturer's instructions.
- Gently fold in the prepared cherries, then transfer the mixture into an airtight container.
- Freeze for at least 4 hours or until firm.
Serving
- Scoop into bowls and enjoy your delicious cherry ice cream!